ALU PCR / Micro Pipet Lab
|
|
This was the first lab we did to start out sophomore STEM. The objective of this lab was to familiarize ourselves with micro pipetting. Here are the materials we used:
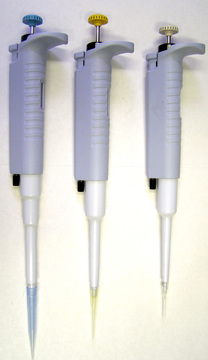
- Micro pipets: P-10
P-100
P-1000
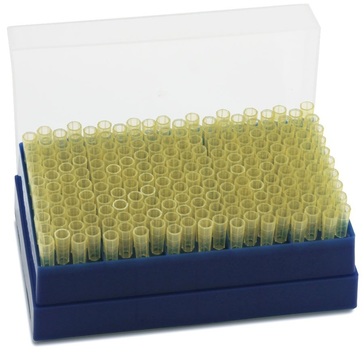
-Test tube for 1.7 mL tubes
-Reaction tube: 1.8 mL
- Permanent marker
- Red Dye (1 mL)
-Blue Dye (1 mL)
-Yellow Dye (1 mL)
-Tube Trays
-Micro Centrifuge
-Wax paper
-Tube, 50 mL
Procedue:
1. Label 2 reaction tubes with your initials
2. Add amounts of the liquid in the amounts shown above.
3. Spin them in the micro centrifuge.
4. Compare with other group/class mates
5. Calculate accurate percentages
Results/Analysis/Conclusion: The lab went pretty smoothly for my group, especially since it was the first time ever doing a lab of this sort. We followed the instructions step-by-step and came out with decent results. This lab was actually a very interesting project to start off the year. It was a great learning experience. One problem that my group ran into was the organization aspect, and getting the liquid that we were supposed to micro pipet accurate. We messed up with the liquid more than a few times, whether that be we added the wrong amount of a certain dye, or combining liquids that weren't supposed to be mixed until later in the procedure. After a few tries, we managed to get back on track. This lab highly focused on DNA, and in this case, we used our own that we took from our mouths using a salt water solution. Mine was particularly difficult. When you put the DNA samples in the centrifuge, it's supposed to spin it so much that it creates a semi-solid ball at the bottom of the tube. Only then could you precede. I had to try at least twice to get this to work.
- Micro pipets: P-10
P-100
P-1000
-Test tube for 1.7 mL tubes
-Reaction tube: 1.8 mL
- Permanent marker
- Red Dye (1 mL)
-Blue Dye (1 mL)
-Yellow Dye (1 mL)
-Tube Trays
-Micro Centrifuge
-Wax paper
-Tube, 50 mL
Procedue:
1. Label 2 reaction tubes with your initials
2. Add amounts of the liquid in the amounts shown above.
3. Spin them in the micro centrifuge.
4. Compare with other group/class mates
5. Calculate accurate percentages
Results/Analysis/Conclusion: The lab went pretty smoothly for my group, especially since it was the first time ever doing a lab of this sort. We followed the instructions step-by-step and came out with decent results. This lab was actually a very interesting project to start off the year. It was a great learning experience. One problem that my group ran into was the organization aspect, and getting the liquid that we were supposed to micro pipet accurate. We messed up with the liquid more than a few times, whether that be we added the wrong amount of a certain dye, or combining liquids that weren't supposed to be mixed until later in the procedure. After a few tries, we managed to get back on track. This lab highly focused on DNA, and in this case, we used our own that we took from our mouths using a salt water solution. Mine was particularly difficult. When you put the DNA samples in the centrifuge, it's supposed to spin it so much that it creates a semi-solid ball at the bottom of the tube. Only then could you precede. I had to try at least twice to get this to work.
